a room for two
This is technically a bit of a throw back, since it was aaaabout nine months ago when my sister and I finished the bedroom for both my peanuts. But it was such a fun project and something I have been wanting to share, so here it is now. I am so lucky my sister just so happens to be an interior designer! And I’m even luckier that she ‘gets’ me, since not too many people could [probably] handle my crazy.
When I was pregnant with my son, my sister was actually living with my husband and I in our two bedroom apartment in Los Angeles. We had a good arrangement with the three of us, so when the baby came, my sister did not move out right away and the baby slept in our room for about his whole first year. By the time my sissy was ready to move out, nursery decorating really wasn’t in the budget. We had the baby furniture we needed for him, but it was just a smattering of the essentials and was nothing too fancy. As a creative person, I always felt a bit sad that I didn’t get the chance to decorate a nursery the first time around. So when I found out I was pregnant with my little girl, I was on a mission to get my nursery decorating experience.
Of course now we had some added challenges. My son already had some cute pieces I wanted to incorporate into the room. Trying to pick a color scheme and cohesive look for different genders wasn’t easy. And the family budget was still pretty limited- especially with a second one on the way! So I enlisted the help of my sister’s creative eye. And my husband and I agreed on a budget of $1,000. Now $1,000 is a lot of money, but we had a lot of new items to we needed to purchase and basically the whole room still to decorate. To tackle this big project, my sissy and I started out with a shared Pinterest board for inspiration and from there, I started doing a lot of shopping around. She helped with color palette, paint, decision making choices about furniture and accessories, and even some manual labor. As you go through my sources, realize some items we did already have existing, so the total amount may not add up exactly. But with a combination of thrift shopping, DIY projects, and of course our good friends over at IKEA, we were able to stay on budget and make the room everything I wanted it to be! Let’s start on little A’s girly side of the room.
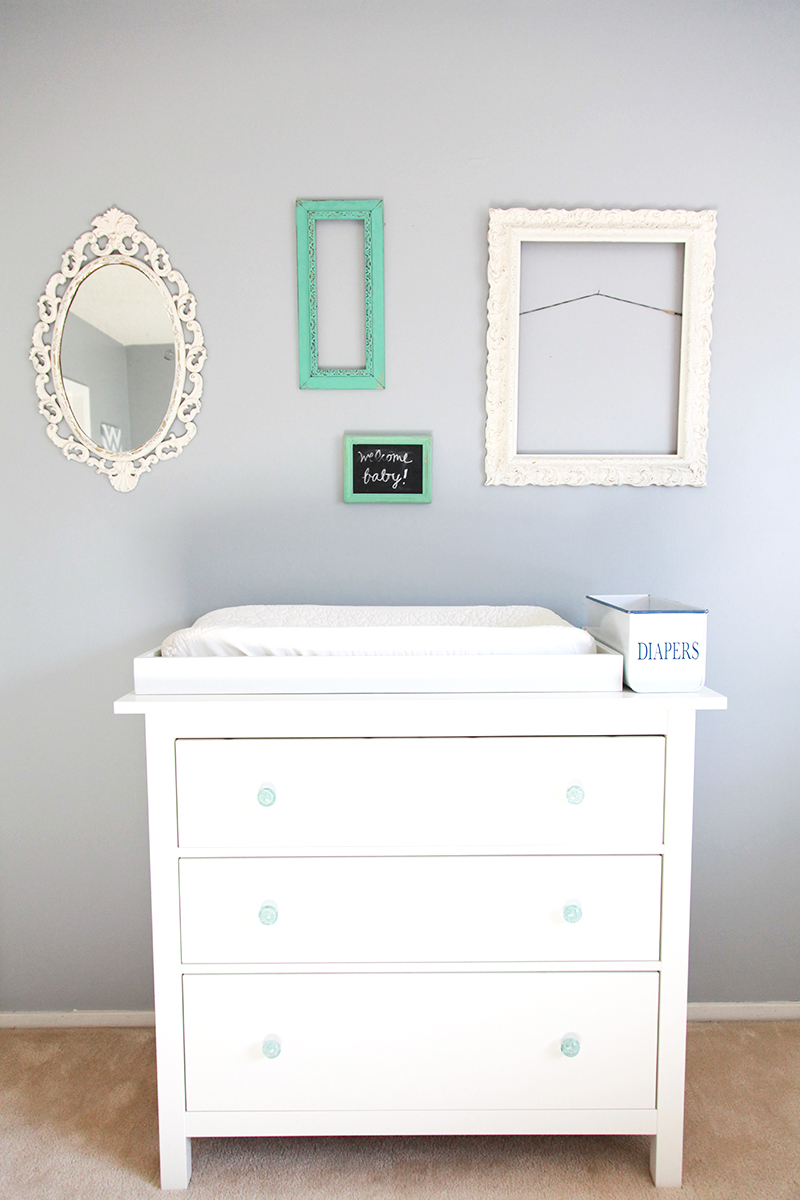
 ♥ mirrors/ frames were all found at various vendors at the Melrose Trading Post in LA.
♥ change top (we already owned) is from The Land of Nod (pssst it can bolt onto almost any dresser!)
♥ dresser (already owned) is from IKEA but we put our own nobs on it for a personal touch which I found at Home Goods.
 ♥ I wanted a super girly initial for the little miss, but had trouble finding one of the scale I wanted because I already had brother’s oversized A initial (see below). So of course I turned to Etsy. And painted it myself.
♥ These curtains were a fun DIY project sissy and I did together. They’re actually plain white ones we bought from IKEA. All hardware and curtain liners are also from there. The stripes are fabric paint! This project was a huge $$ saver.
♥ the little pillow is from Target (no longer available) and the stuffies were gifts.
♥ I really couldn’t find exactly what I wanted in crib bedding from any one place so I mixed and matched. This white ruffle bumper is from Pottery Barn Kids and I sewed on the mint grosgrain ribbon to match the room. The crib skirt was also from PB but the exact Georgia model they don’t make anymore. This Harper one is pretty close to the same idea. The crib sheet is from Land of Nod and matches brother’s bed.
♥ we did have a crib before, but it was not the right color, so I sold our old one on craig’s list to get this simple one from IKEA.
♥ this oversized letter A I bought a while back from anthropologie, but they continuously carry it.
♥ the tree decal I found at target.com but this one is no longer available.
♥ his bed is from IKEA. I like that it’s low to the ground since he was moving from basically his crib into a big boy bed and I was worried about him rolling out of bed at night.
♥ his bedding is from Land of Nod and matches his sister’s.
♥ the little side table between their beds was another Melrose Trading Post score.
♥ the lamp was a simple one from Target (not available online) and I painted the chevron pattern onto the lampshade myself.
♥ big A’s white shelf with the baseball bat and hooks was a custom made gift from his aunt & uncle.
♥ his custom stretched canvas print I ordered online through a deal I got on Gilt– but it was a while ago so I can’t remember the vendor!
♥ the little table and chairs (we already had) are from Kid Kraft.
♥ the chevron canvas was just a blank canvas we painted to match the room.
Well I think that’s most of everything. Do you see anything I didn’t describe? Want to know more about or a step-by-step of any of our DIY projects? Click through the header of this post to get to the comments section and let me know. I’d love to hear from you!
photography credit goes to Elizabeth Bernstein Photography.


July 29, 2014 @ 9:45 AM
I love love how the room turned out! Great job girls! Xxoo