diy: vegan gluten-free ombre naked cake
Last year, for my little girl’s first birthday party, I had a clear vision for pretty much everything about the party, but specifically for the kind of cake I wanted. At the time, I was seeing a lot of variations of ombre cakes floating around and also some really beautiful, simple looking naked cakes. I decided why not combine the two ideas into one cake? However finding a cake that met the dietary restrictions of my dairy-sensitivie kiddos and gluten-free husband is always an extra challenge. I personally have played around with being a vegan as well, although I would not consider myself a true vegan by any means. So I needed a cake that everyone in the family (and our guests!) could enjoy. I thought I might be able to find a bakery in Los Angeles that could take on such a request, but I honestly was worried about the cost of a professional bakery on our tight party budget.
I was temped to take on this project myself, but I already had several other DIY projects (also here and here) on my plate for the party, so I decided to ask my beautiful friend and talented home baker Tina for some help. Tina has worked as a producer on several different television shows in Los Angeles, one of them being Food Network’s Cupcake Wars and recently she has been working on the newest Food Network show, Cake Wars. From her work there, Tina picked up a few extra tips that helped her make this project a smashing success. I also have to give my talented friend a plug for her new personal project she just launched called Time Out with Tina, where she explores stories about the human spirit from behind the lens with all her masterful producing and editing skills. Be sure to check out her newest video on her website in the above link!
After the party and my blog post, our party was also featured on the Inspired by This blog. Between those two blog posts and all the interaction I got from them both on social media, it became clear that the cake was the biggest hit of the party. I saw several comments about people wanting to DIY this cake too, and while it is totally do-able, don’t be fooled – it was not easy! Tina did more than one practice round before the big event and was even nervous on the day of the party that it hadn’t turned out quite right (but it was perfect). So I asked Tina if she would walk me through what she did in a miniature version of the vegan gluten-free ombre naked cake with all of her little tips and tricks she learned through her practice rounds and from her professional experience to make this dream cake a reality so I could share it here with all of you!
For the cake and frosting itself, I lent Tina one of my favorite baking books for my highly food restricted family, BabyCakes: Vegan, (Mostly) Gluten-Free, and (Mostly) Sugar-Free Recipes from Erin McKenna’s Bakery. As baking is a science, it’s always a good idea to start from a tried and true recipe unless you are a true professional who understands that science well. I highly recommend the book for any sweets lover who is concerned about potential or real food sensitivities/allergies!
Tip One: [not shown in pics here] it’s actually a good idea to start with the frosting recipe first as it needs to chill for at least 6 hours or up to overnight to set properly. Also, the recipe calls for one tablespoon of coconut flour, but we added two to get a slightly thicker texture. And while the frosting process is fairly simple, it is very important to add/mix in the ingredients in exactly the way the recipe indicates in order to get the proper texture. We mention all of this because it is very easy for this delicate frosting to become too liquidy and it will melt if left out at room temperature or above for too long.
Once you have your batter ready to go, separate it into however many bowls you need to for the different layers. For this mini cake, we did four different layers, but the original birthday cake had five layers. Also note that we decided to do a two-tiered cake here (just for fun), but the original was just one diameter for all layers. You can do it either way!

 Tip Two: Regular food dye is not going to cut it. I originally gave Tina a set of basic food dye colors from my cupboard to practice with, but the red dye just made the cake more or less red. So Tina went out and got this special gel icing color
 in two different shades of pink
to get the variety of color you see in the finished product. Now if you are the super-natural type, you may argue here the downfalls of artificial food dyes in general. I hear ya, but for this cake, no natural food dye will achieve the carefully crafted color you see here!
Tip Three: Mix the icing color in one toothpick drop at a time to see the color you are coming up with as you do it. Also note that the color you see in the batter is darker than the color that will come out after you bake them, so don’t panic if it seems too dark at this stage. We left one layer completely ‘white’, but as you can see, the natural ingredients in this cake make the ‘white’ layer more of a soft ivory color, which I personally prefer. Start with your lightest color and move to the darkest.
Pour the batter into the individual pans and bake per the recipe.
Let the cakes cool completely before removing from the pan. Which brings us to…
Tip Four: to save time and to help the cakes come away from the pan more easily, place the cake pans directly in the freezer once they come out of the oven for a few minutes.
Tip Five: another good way to ensure that your cake pieces come out clean and easy is to cut a small round circle of parchment paper for the bottom of the pan before you pour the batter in. Grease liberally both on top of and underneath the parchment, as well as the sides of the pan. Look how clean this cake came out on the bottom with this clever trick!
Now, in order to really see the color on the outside “naked” part of the cake, you have to carefully trim around the edges. The best type of knife for this is a serrated bread knife, but any sharp knife will work just fine. Tina also recommends this rotating cake stand to help make trimming easier and more even.
Then, carefully trim off the rounded top of the cake to create a flat surface for the next layer. Repeat trimming with each layer.
Now, go back to your bottom layer and get your frosting out of the fridge. Plop some right on the center and spread outwards, but not all the way to the edges.
Carefully add your next layer and repeat. Don’t worry if you can’t see too much of the frosting coming out of the edges, we will fill in on the next step!
Give your cake a final spin or two to make sure all your edges are (mostly) even and trim more as needed. Remember that this is a naked cake though, so ‘perfectly imperfect’ is the goal! Transfer the cake to the plate or cake platter you plan to present it on.
Now, fill in any space between the layers on the edges with a piping bag.
Then just smooth out the frosting, add flowers or any other decorations you want, and you are ready to present your beautiful cake to your party guests!
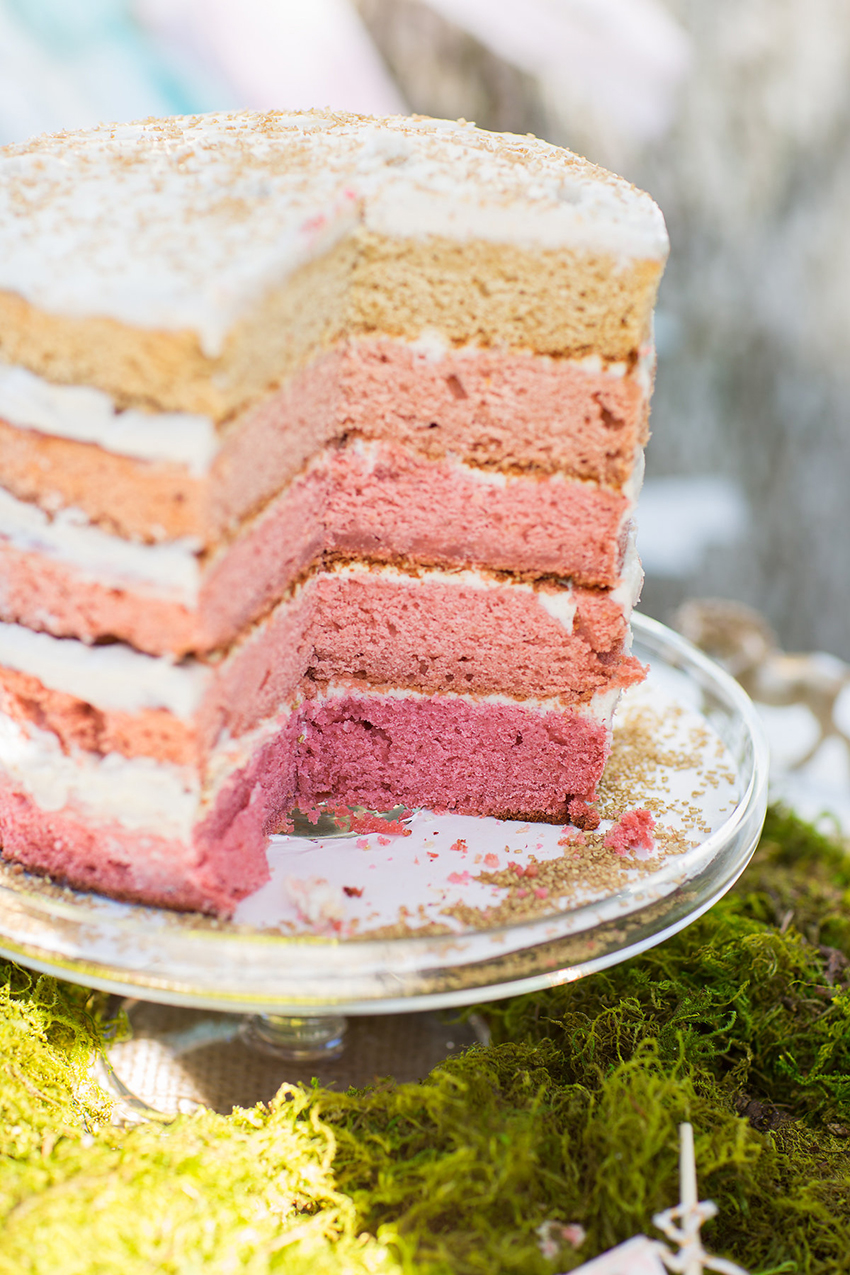
 Just for comparison’s sake, here is the original full size cake from the party. And yes it tastes as good as it looks!
The apron, potholders, measuring cups, and measuring spoons shown in this post all came from anthropologie (although not all exact styles are currently available).
[disclaim]All images (except this last one) are owned and copyright The Love Designed Life. Final image is copyright B.Hansen Photography. Please do not re-use any images without express written permission by the respective copyright owners. This post contains some affiliate links. Thank you for supporting products which allow me to continue to create original content for this blog. As always, all opinions expressed here are my own.[/disclaim]


July 7, 2015 @ 4:43 PM
Love this post! And the cake recreation looks amazing! And I am sure that since the original cake was delicious this one was equally tasty!